Sunday 25 August 2013

Craftroom re-modelling continues...

You may recall from my previous post that I had to clear my craft desk so that my friend Tim could re-site it at a better height - and intended doing it whilst I was away so that I "didn't get under his feet"...

Well, I arrived back in Southend on Thursday evening, after a knackering coach trip and then driving back round the M25 after dropping my sister home - staggered up my stairs with my bags and stopped dead... for at the top of the stairs was the bottom half of the Ikea Billy bookcase...

I thought Tim's plan was just to get the desk to the correct height, but no... he went all out and totally replaced the desk so that it is a huge 'L' shape running under the window and under the bookcase - which is going to be re-sited a little higher up the wall to give me clear working space underneath it!

The bookshelf is currently sitting on the desk but once it is moved (and probably shortened a bit more) there will be a massive desk area for me to spread out on - heaven!

Under the desk on the left he has built a little cubby which as well as providing support for the desk top, will house a built-in purpose cupboard for my scrapbooking papers/cardstock - we're in discussion as to how exactly this will work but he has a "cunning plan" so I'm leaving him to it... I did suggest however that the bottom half of the bookcase could well slide under the desk flat against the wall and provide more storage space for my Really Useful Boxes (that seem to be multiplying at an alarming rate)... there will still be more than enough legroom under the desk so no worries there.

Not sure yet whether the black drawer unit is staying or being replaced - but right now it's happy there. The other two white units are being replaced at some stage too.

He has made a great start but is not finished by a long shot - but life (and weather) gets in the way - we've had seriously bad flooding in Southend today and roads have been closed, so he took the opportunity to work on something else, but will be back in due course to carry on the re-model.

And I can't wait to get crafting on it!

Scotland ahoy! (heavy on the pics tho...)

I've just got back from my break in Scotland with my sister - we went on a Lochs and Glens coach trip and stayed at the Inversnaid Hotel on the bonnie bonnie banks of Loch Lomond - and very bonnie they are too! The main reason for the trip was to visit the Edinburgh Royal Military Tattoo which we have both wanted to do for ages - and boy it is so worth it if you get the chance to go... I love the sound of the pipes and drums, and watching the precision marching and inter-weaving and entwining they do - absolutely stunning.

As well as Scottish and English bands they have bands from abroad - this year there were bands from North Korea, Mongolia, Mexico and New Zealand - the latter keeping everybody well entertained with their singing, dancing "Gangnam Style" (yes - honestly!) and finishing off with the Haka...

The Imps junior motorcycle display team were also there, whizzing around the auditorium and doing fast crossover passes - whilst riding their bikes standing facing backwards - heart in mouth time but their timing was perfect. So too was the marching from the girls from New Zealand - they also did a routine which included perfect crossovers whilst marching backwards!

As well as the tattoo, we visited Stirling and the Wallace Monument, the Glengoyne Distillery and Callendar, as well as driving through some stunning scenery over The Dukes Pass. We also had a short cruise on Loch Lomond itself which was very informative, all about Rob Roy and the Duke of Montrose. All in all a very busy and packed 3 days, with a day each side for the journey up.

It was a nice break and very good value for money, its now the third time I've been away with Lochs and Glens and certainly intend going again - but next time I'll be a devil and go for longer - 3 days just isn't long enough to get over the 12-hour or more journey on the coach up there (especially when the selfish cow in the seat in front of you fully reclines her seat into my knees without warning and gives me zero legroom for the whole holiday grrr)

So - pictures...

To get you in the mood, here's the piper at Gretna Green


Inversnaid Hotel


The Arklet Falls - right next to the hotel


Reflections of me and my sister in the waterfall!


The Scot Monument, Edinburgh
 

Greyfriars Bobby and his pub


Massed bands at the Edinburgh Royal Military Tattoo
 

Me and my sister at the Wallace Monument, Stirling
 
 
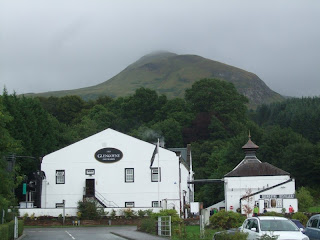
The Glengoyne Distillery
 

Reflections on one of the many lochs we passed
 

Lily pads on Loch Achray
 

The Haggis Farm on Loch Lomond
 
Oh ok, so the last picture isn't really a haggis farm - but that's how the tour guides describe it... it's actually the hydro-electric power station feeding from Loch Sloy way up at the top of the mountain - but according to the tour guide it's the haggis factory... Haggis's - or more properly Haggi - are a wild 3-legged creature that roams the mountainsides of Scotland, feeding on the heather, and they are chased and caught and sent to the building at the top of the pipes which is the slaughter-house... they are then prepared and rolled down the pipes (which gives the haggis the traditional round shape) and then arrive at the bottom building which is the packing station... where they are packed and sent to Tesco's...
 
Believe that and you'll believe anything... :-)

Wednesday 7 August 2013

Slightly less over-whelmed...

I've now made serious inroads into tidying and boxing up my craft stuff ahead of the first stage in re-modelling my lounge into a lounge-cum-craft studio - still have a ways to go but thought I'd share what I have done so far.

ALL the carrier bags that were under the table and around the chair have been emptied and the contents found proper homes for - now I can get under the desk and start to pull out the tools and odds and sods that have migrated under there. The sewing machine (which is a 1952-ish handcranked jobbie) is going to a friend from Benfleet Scrappers, so that'll release some more space.

I've made a good start at clearing the desk itself, some things have been put away where they should have been put away well before now *looks all sheepish and hangs head guiltily* but other things have had to go into storage boxes for now, until I can find proper homes for them. I've also earmarked a lot of stuff to either sell, move on, recycle or (shock horror) purely throw away as it's no use to man nor beast - or even other crafters! I know that "One mans trash is another mans treasure" - but seriously peeps... there is a limit here, and some things have just reached it!

To help with storage I've bought some rather lovely sturdy but collapsible storage boxes from The Works - they were a fiver each but well worth it as they look lovely - I've got 2 of each design, London and Paris, as well as a 5th one which has the London Underground map printed on it. They are a good size, they take a 12x12 ziplock baggie laying down nicely, so all the baggies of half-finished and "yet-to-start" layout projects I've had laying around can go in one, all the kits bought from Total Papercrafts etc can go in another etc... As you can see this is definitely a work in progress, piles of stuff moved away from the craft desk just so's I can get near it to clear it, but it will all sort itself out eventually.

The plan is for these nice storage boxes to go under the shelf that the DVD/video player is on - currently under there are several carrier bags containing holiday ephemera - y'know, all the "crap" you bring back from your holidays that you want to use in scrapbook albums for that holiday: brochures, ticket stubs, newspapers, postcards etc... they are all piled up and sliding around looking messy. So if I put the bags into a couple of these smart storage boxes instead it'll look much neater. And with a luggage label tied to the handle of each one (thanks for that great idea Toni!) I can easily locate which box has got what in it.

But that is phase 2 - or even possibly phase 3 - clearing the top of the craft desk so that it can be removed and re-sited takes priority, and I only have a few days left to do this.

So I'd better hop to it!

Playing with PaperArtsy!

Finally! (I hear you say...) I'm getting around to blogging my trip over to Barleylands last Saturday with Toni (misteejay) to watch a demo by Leandra from PaperArtsy at Sugar & Spice.

Can I just say - right from the outset - that I had no intention of buying more than a couple of the JOFY stamp sets, the ones that they have used in this months Craft Stamper... and maybe one or two other bits...

Yeah. Right. No further comment. Ahem...

Moving swiftly on, I did also go back to Pinnacles with that Fiskars trimmer as I'm still not getting on with it, Andy tested it out for me and agreed that this one is STILL not cutting straight, so I am now the proud owner of a Woodware trimmer which is a) cheaper, b) has loads of interchangeable blades, c) feels much more sturdy on my desk and d) you can cut up to A3 on it whereas the Fiskars one couldn't... so all in all  a much better purchase methinks!

Anyways, back to PaperArtsy... and hot damn those JOFY stamps are rather lovely - these 2 sets were the ones I'd planned on, the 2 mini's were "just because"...

Leandra did some gawjuss demo's using their Fresco Finish chalk acrylic paints, so one or two of those had to hop into my basket as well, I think I now understand the difference between opaque and translucent paints and have a finer appreciation for the chalk finish as opposed to the standard matt finish of acrylic paints. Just as I thought I'd gotten away lightly, she started playing with their crackle finish and grunge paste... "shop!!!"... Fab demo's, lots of video taken and several photos too -


 Oh.My.Gosh. I am so in love with the crackle finish! She made it look so easy, but the product itself is as easy as pie and does all the hard work...

Base coat in a blue Fresco Finish chalk acrylic (don't ask me which one, I've slept since then lol) then a VERY THIN coat of crackle finish applied with a palette knife, it dries almost straight away and then a THICK coat of Nutmeg or Snow White chalk acrylic on top - she says you can either use a brush with lots of paint on it, or heavily load up a piece of Cut'n'Dry foam - but either way to only give it ONE coat and move on, don't go back over it too much... then zap with heat gun... and WOW - all these fabby cracks appear - the finer ones are from where the top coat of acrylic was applied a little thinner, so the moral is: the thicker the top coat the better the cracks...


Lots of inspiration, lots of laughs, we sang "Happy Birthday" to Leandra 'cos she'd given up some of her birthday to come over to Sugar and Spice to demo for us which was very sweet of her, and then Toni and I headed out to hit Pinnacles and then the bistro for lunch - jacket spud with tuna mayo and a side salad. They've opened the new wine bar next door now, shame we were both driving as they were handing out glasses of plonk to celebrate... grrr...

Whilst noshing we compared notes on our various purchases, and both decided that one or two more paints were required, so we headed back to Sugar & Spice. Leandra had already left and Marion, Barb and Nina were in full swing demoing and showing off the display boards that Leandra had left for us - some lovely ideas on them to whet the appetite. Anyhow, one thing led to another, a chance remark along the lines of "you running this as a make'n'take then ladies?" and those of us there ended up spending a happy couple of hours playing with the paints, crackle finish and grunge paste, which was applied thru stencils and then covered over with Treasure Gold gilding wax... here's the two pieces I made and am rather pleased with...

 
Love love love the crackle finish - I want to have a serious play with this by myself now, so really need to get my craft area sorted out!

 
Interesting effect, I like the grunge paste but not too sure on the Treasure Gold, I've seen some fab pieces where the grunge paste has been painted instead and it looks much nicer and is more controllable. And, to be honest, acrylic paint is much cheaper - I appreciate that Treasure Gold is used very sparingly and is a seriously decent product, but its very expensive compared to the other gilding waxes you can get - and its not something I think I will want to use that often...)
 
So that was our day at Sugar and Spice - a lot of fun, a lot of inspiration and some new products and stamps to play with - just need the space and time now!